Popsicle 3D Printer
Designed and built in collaboration with Juju Wang and Prashanth Prakash.
Description
My friends and I built a printer to make edible, frozen popsicles. We started with a Velleman K8200 printer, which uses a bed-XY design. With this printer design, the print head only moves in the Z direction, and is rigidly attached to a piece of aluminum framing. This made it easier for us to change out the filament extruder for our custom slush extruder.
Slush extruder
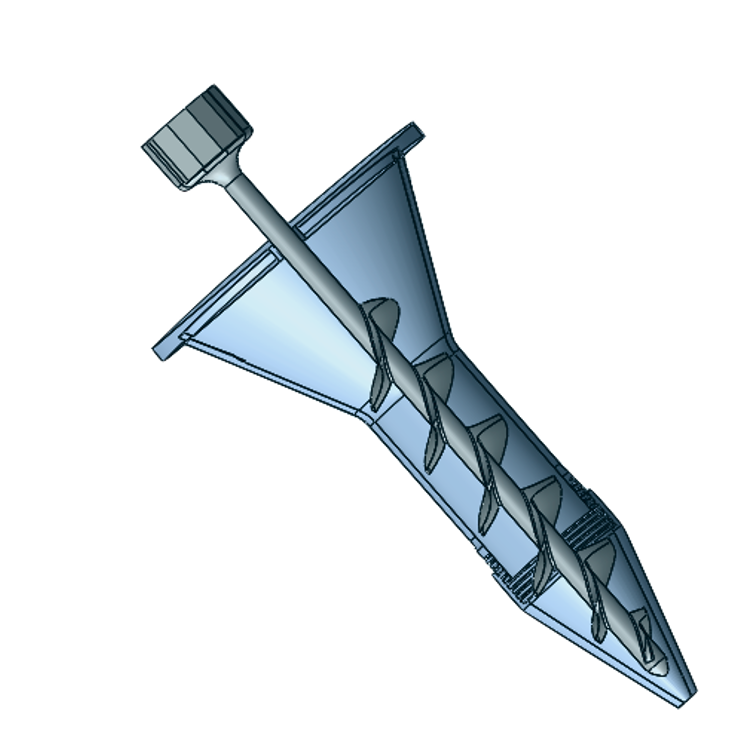
A screw drive mechanism was used to extrude a partially frozen slush feedstock, as shown in the figure below.
Chilled build plate
In order to freeze the slush feedstock into a solid popsicle, a chilled build plate was used. This was done by submerging a tray in a bath of dry ice and ethanol. We chose this method over other possible methods (refrigeration unit or LN2 injection in slush) because it was mechanically simple, and allowed us to use the printer in ambient, open air. This chilled build plate concept is shown below.

Integration with printer
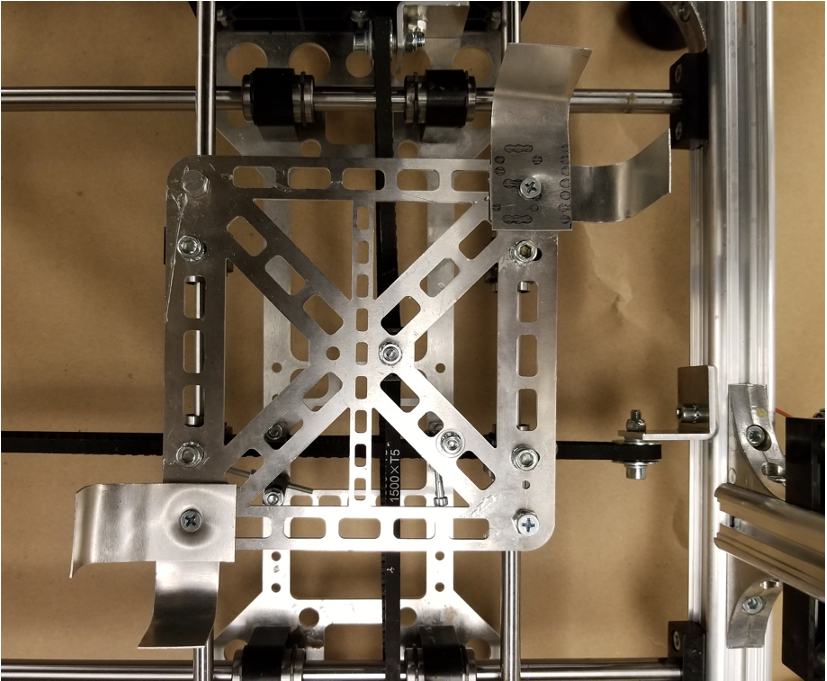
The chilled build plate was attached to the printer using simple sheet metal brackets:
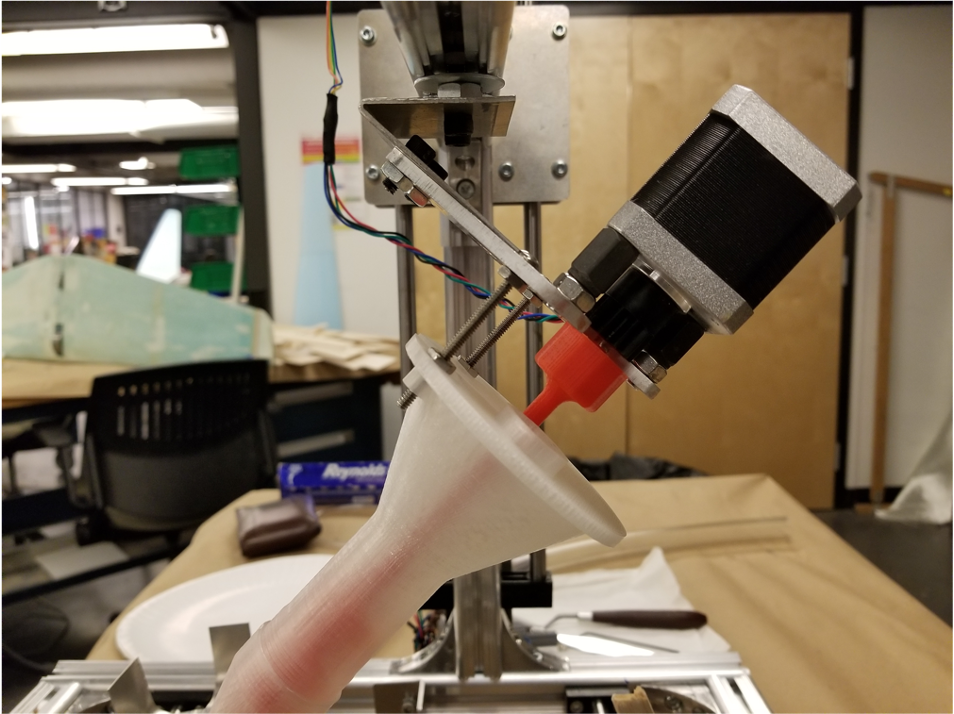
The end of the screw drive mechanism was designed to key directly with the filament extruder motor that came with the base printer kit:
Calibration and tuning
The relationship between the screw drive extruder mass flow rate and motor speed was measured. This measurement then let us characterize the first layer freezing time vs extrude mass flow rate:
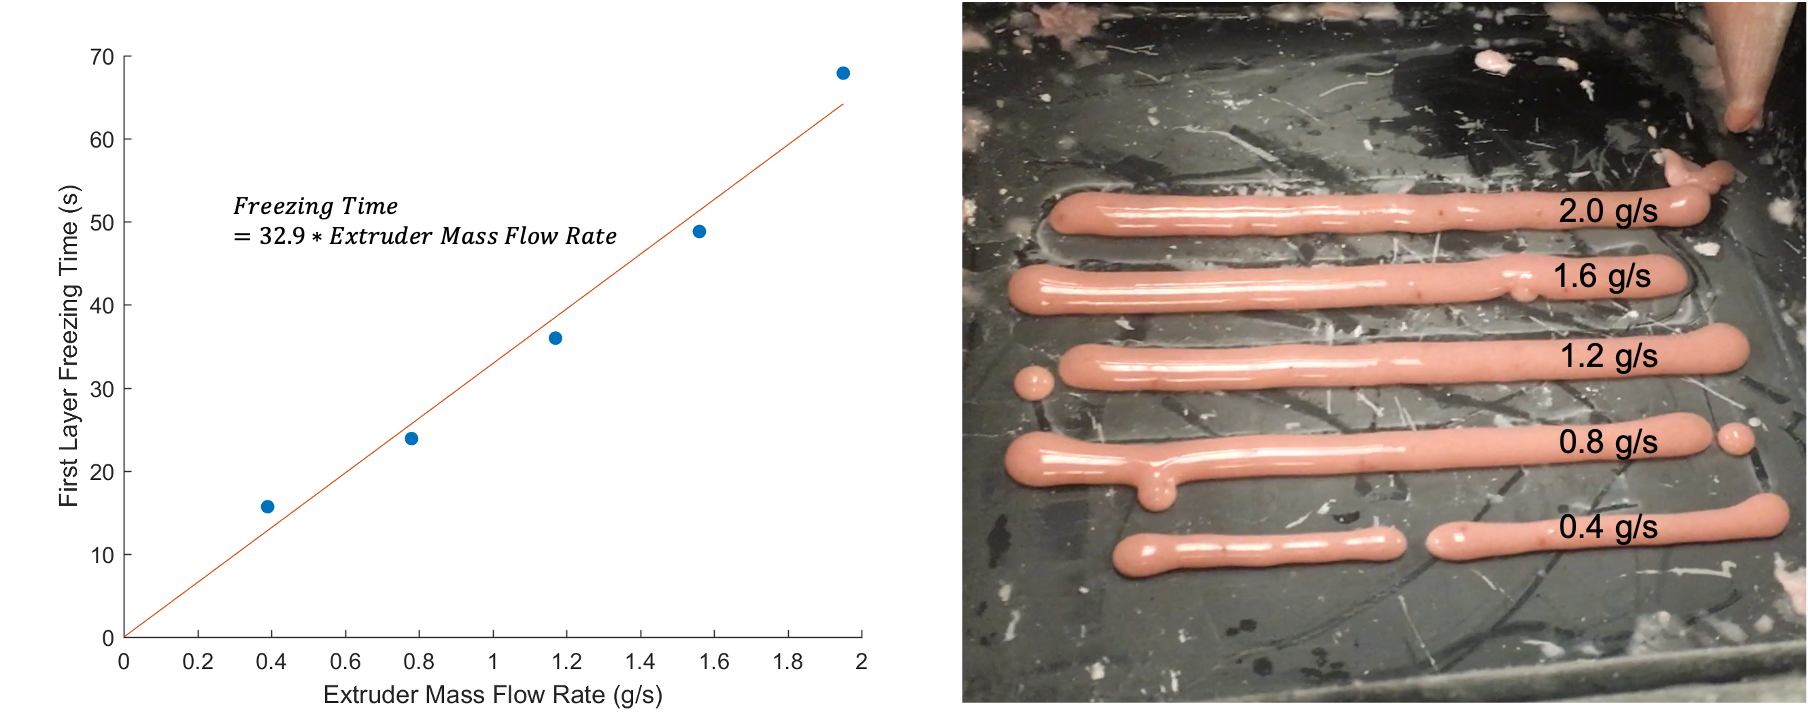
We selected a mass flow rate of 1.2 g/s, and with that flow rate we characterized the layer freezing time vs layer number:
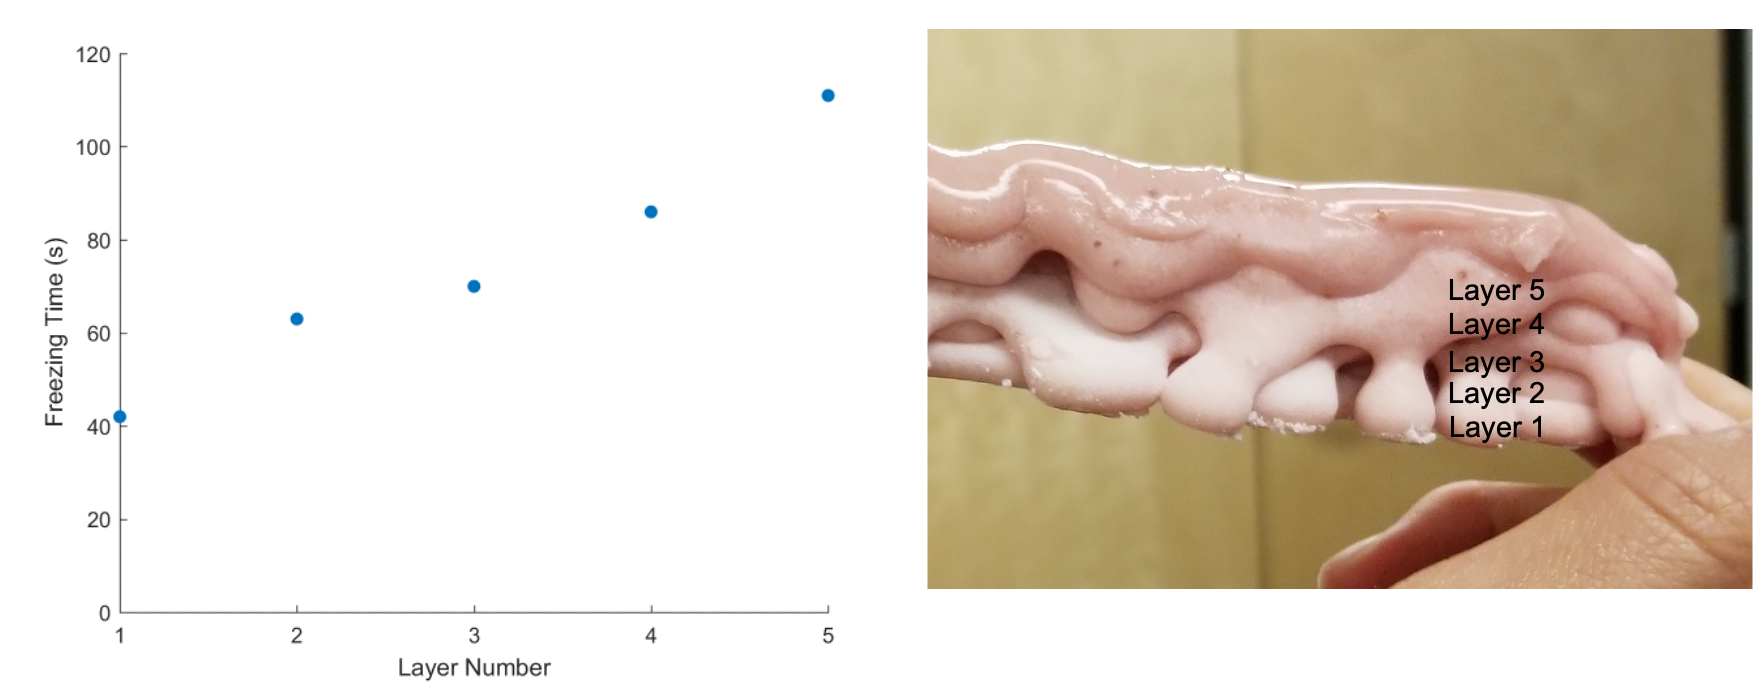
Once we’d characterized these printer parameters, we could write custom gcode for (attempted) printing of various popsicle shapes.
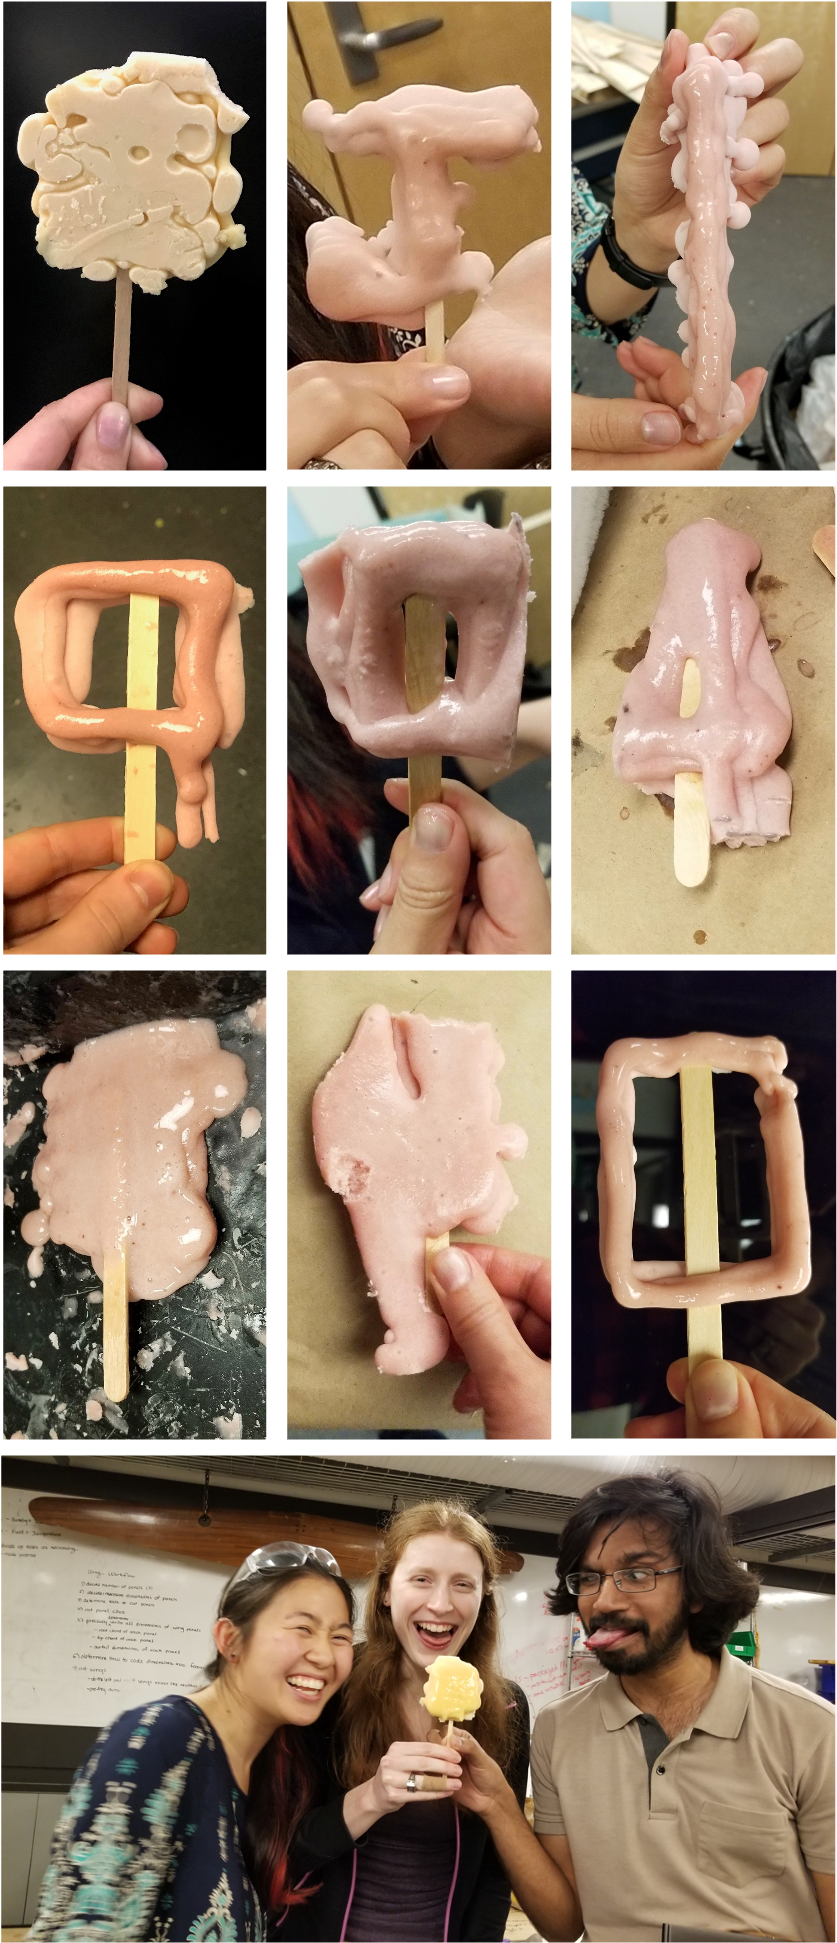
Gallery of Popsicle Attempts
